
I did not expect green beans to be the dish that converted me to sous vide cooking. Honestly, I bought the immersion circulator for steaks.
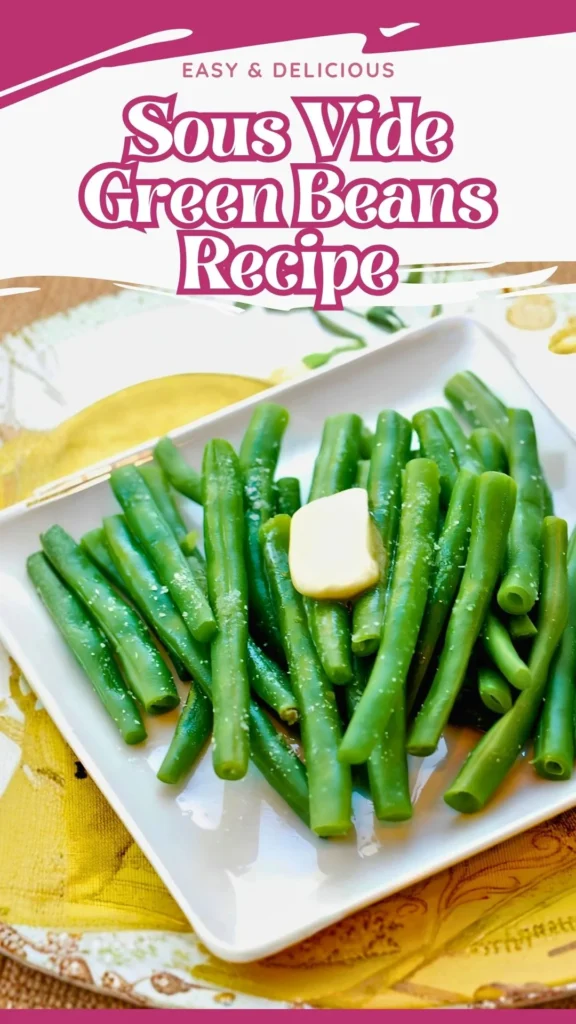
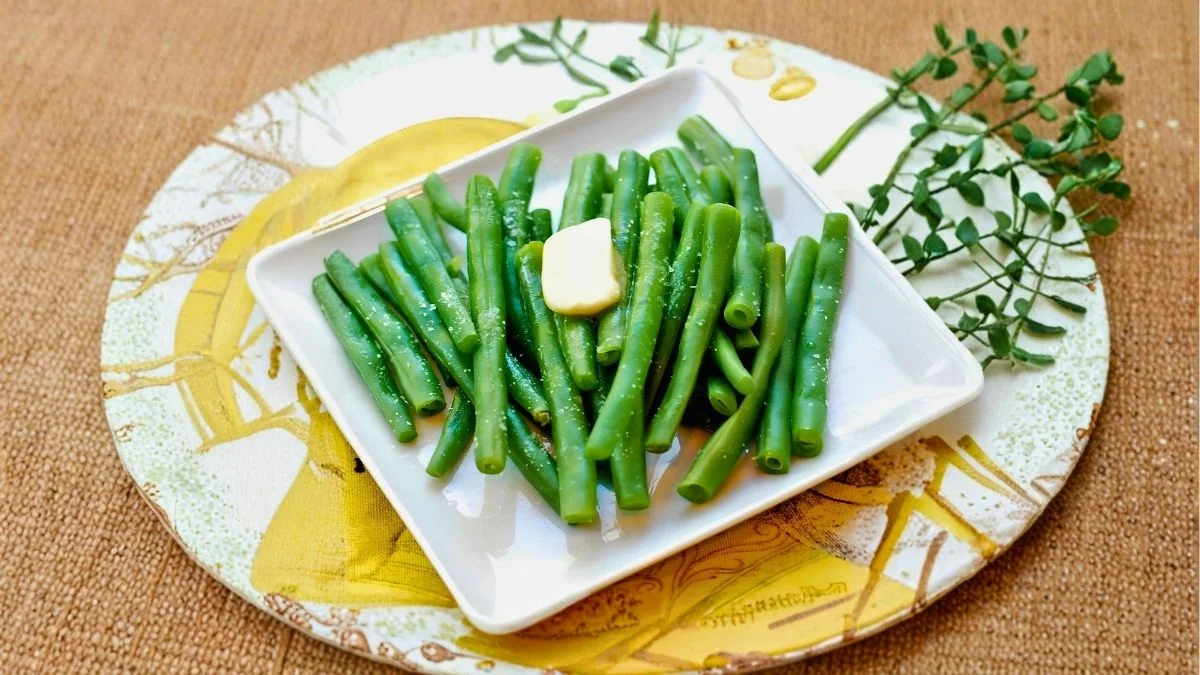
But one night, with nothing else on the counter, I dropped a bag of trimmed beans, a tablespoon of butter, and a pinch of salt into the water bath – and an hour later, I pulled out the most vivid, perfectly tender green beans I had ever eaten.
No drained pot of cloudy water. No guessing at doneness. Just bright, glossy beans coated in a silky butter sauce that had nowhere to go except all over the vegetables themselves.
This Sous Vide green beans recipe requires only three ingredients and about five minutes of real effort. If you have been treating your immersion circulator as a steak-only appliance, this is the side dish that is going to change that.
Note: This recipe makes 1–2 side-dish servings. It scales up easily – simply use additional bags with the same ratios.
What Are Sous Vide Green Beans and Why Do Home Cooks Love Them?
Sous vide green beans are fresh green beans sealed inside a bag and cooked in a temperature-controlled water bath held at a precise, steady heat for the entire cooking time.
That single detail – precision – is what separates them from every other cooking method and why home cooks who try them rarely go back.
Boiling destroys the bright green color by breaking down chlorophyll in the cell walls. Steaming is gentler but still imprecise – pull them thirty seconds too late and they are limp. Roasting adds flavor but dries the beans out.
Sous vide does none of that. Because the bag is sealed, the beans cook in their own natural moisture alongside the butter, creating a concentrated, glossy sauce that forms without any extra work.
The color stays vivid because there is no oxygen exposure. The texture is uniformly tender from edge to center – not soft, not squeaky, but exactly the firmness you want, every single time.
That reliable, restaurant-quality result from three ingredients is why sous vide green beans have become a staple for home cooks who discover them.
The History Behind Sous Vide Cooking and Its Journey to Your Kitchen
Sous vide – French for “under vacuum” – was developed in the early 1970s as a professional kitchen technique.

French chef Georges Pralus began experimenting with vacuum-sealed foie gras, discovering that cooking it submerged in precisely heated water reduced shrinkage and dramatically improved texture.
Around the same time, food scientist Bruno Goussault was independently researching low-temperature water-bath cooking and documenting the science behind it, eventually collaborating with Michelin-starred chefs to establish time and temperature guidelines that are still used today.
For three decades, sous vide was exclusively a restaurant technique. The equipment was industrial in scale and cost thousands of dollars, keeping it firmly behind professional kitchen doors.
Vegetables – including green beans – were actually among the earliest sous vide successes in those kitchens, because the method revealed something fascinating about vegetable science: pectin, the compound that holds plant cell walls together, breaks down at a specific temperature range, allowing cooks to control texture with a precision no boiling pot could offer.
The democratization of the technique came in the 2010s, when compact, affordable immersion circulators from brands like Anova and Breville Joule brought sous vide cooking to home kitchens.
Suddenly, perfectly cooked sous vide green beans went from a fine-dining side dish to something anyone could make on a Tuesday night.
Key Ingredients That Give These Sous Vide Green Beans Their Signature Flavor
This is a three-ingredient recipe, which means there is nowhere to hide – every single component contributes something essential to the finished dish.
Fresh Green Beans
Fresh is the only way to go here. Frozen beans have been blanched before freezing, which means their cell structure is already partially softened.
Cooked sous vide at 185°F for a full hour, they will turn mushy rather than achieving that clean, snappy-tender bite. Fresh beans go in firm and come out with a texture that holds its shape and satisfies.
The preparation is simple: snap off the stem end – the woody tip attached to where the bean grew from the plant – but the tail end is perfectly fine to leave on.
Unsalted Butter
Butter is doing double duty in this recipe. It is the cooking fat and the sauce, all in one tablespoon.
Because the bag is completely sealed, the butter melts and combines with the natural juices that release from the beans during cooking, creating a rich, savory emulsion that coats every surface of every bean.
The reason unsalted butter is recommended is control – different brands of salted butter vary significantly in sodium content, and in a sealed cooking environment where the seasoning concentrates, that difference is noticeable.
Salt
A single pinch of salt seasons the beans from the inside out as they cook. Unlike adding salt to boiling water – most of which gets drained away – the salt here has nowhere to go.
It draws out moisture, enhances the natural sweetness of the green bean, and balances the richness of the butter sauce. Use kosher salt or fine sea salt for the cleanest flavor.
Sous Vide Green Beans Recipe Ingredients
| Ingredient | Quantity | Notes |
|---|---|---|
| Fresh green beans | 4 oz (1 large handful) | Woody stem ends snapped off |
| Unsalted butter | 1 tablespoon | Salted butter works; reduce added salt if using |
| Salt | 1 small pinch | Kosher or fine sea salt preferred |
Substitutions and Easy Swaps
- Butter → Olive oil: Use 1 tablespoon of a good extra virgin olive oil for a dairy-free version with a slightly fruitier flavor profile.
- Butter → Vegan butter: Works exactly the same – same quantity, same result.
- Salt → Garlic salt or seasoned salt: A simple way to build flavor without adding extra ingredients to the bag.
- Green beans → Haricots verts (French green beans): These thinner, more delicate beans cook faster. Reduce cooking time to 45 minutes at the same temperature.
Tools You Need to Make This Sous Vide Green Beans Recipe at Home
- Sous vide immersion circulator (Anova, Breville Joule, or any reliable brand)
- Large pot, deep container, or stockpot (to hold the water bath)
- Sous vide bags or heavy-duty 1-gallon Ziploc freezer bags
- Kitchen tongs or a slotted spoon (for lowering and lifting the bag)
- Something heavy to weigh down the floating bag: a large spoon, a small plate, or a mug
- Knife and cutting board (for trimming beans)
| Prep Time | 5 minutes |
| Cook Time | 1 hour |
| Total Time | 1 hour 5 minutes |
| Servings | 1–2 as a side dish |
Steps to Make This Sous Vide Green Beans Recipe
Step 1 – Heat the Water Bath
Place your immersion circulator in your water container and set the temperature to 185°F (85°C). Allow the water to come fully up to temperature before adding any food.
Starting with water that is still climbing to temperature throws off your cook time and produces uneven results.
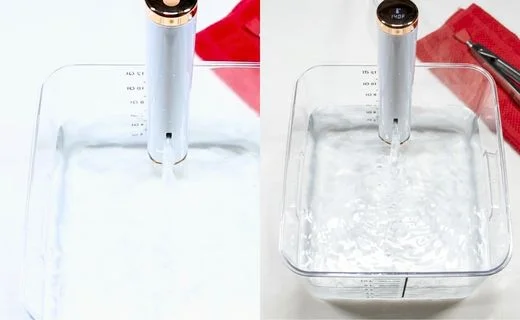
Step 2 – Trim and Bag the Green Beans
While the water heats up, snap the woody stem tips off your green beans. Place the trimmed beans into your sous vide bag or a heavy-duty Ziploc freezer bag.
Add the 1 tablespoon of butter and the pinch of salt directly into the bag with the beans.
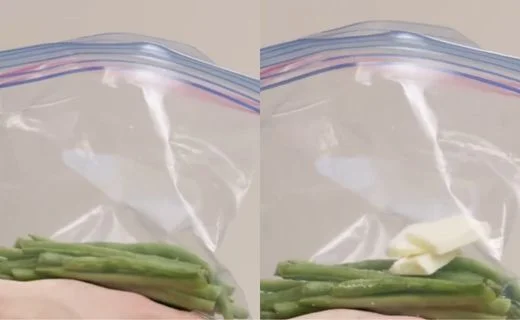
Step 3 – Remove the Air and Seal the Bag
If using a vacuum sealer: Seal normally, following the machine’s instructions.
If using a Ziploc bag: Use the water displacement method. Slowly lower the open bag into the preheated water, letting the pressure of the water push the air out toward the zipper.
Once nearly all the air is expelled, zip the bag closed while it is still partially submerged. This gives you an almost vacuum-level seal with no special equipment.
Step 4 – Cook for 1 Hour
Lower the sealed bag into the 185°F water. Because green beans contain natural air pockets in their cell structure, the bag will likely float.
Place something heavy on top of the bag – a large spoon, a small plate, or a coffee mug – to keep it fully submerged. Set a timer for 60 minutes and let the water bath do all the work.
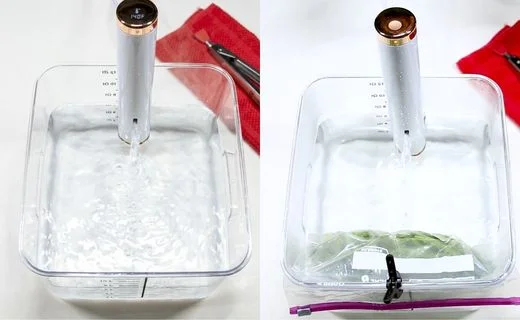
Step 5 – Finish and Serve
When the timer goes off, lift the bag out of the water using tongs. Give the bag a gentle shake to coat all the beans evenly in the butter sauce that has formed during cooking.
Cut the bag open and pour the beans and their sauce directly onto your plate or serving dish. Serve immediately.
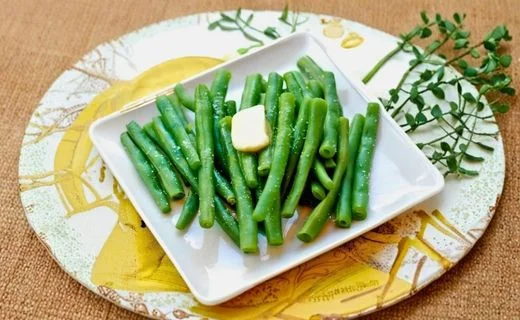
Quick Tip: The butter melts during cooking and blends with the natural juices from the beans to create a rich, naturally emulsified sauce. That gentle shake before you open the bag is what distributes it evenly across every bean instead of leaving it pooled at the bottom.
Pro Tips for Getting the Flavor of Your Sous Vide Green Beans Just Right
After making this recipe many times, here are the specific things that push the result from good to genuinely great.
Do not add the bag before the water is fully heated. This is the single most common sous vide mistake. If your water is at 160°F when the bag goes in, your effective cook time does not start until the water reaches 185°F – and by then your timing is off.
Wait for the circulator’s indicator to confirm target temperature before anything goes in the water.
Weigh the bag down properly. A floating bag means portions of the beans are cooking in air rather than water, and those spots cook inconsistently.
Use any food-safe heavy object: a large stainless steel spoon draped over the edge of the pot, a small plate pressed on top, or a dedicated sous vide weight if you have one. This is not optional – it matters for the result.
Do not rush the water displacement method. Lower the Ziploc bag slowly into the water. Rushing it traps air before the pressure has time to expel it. Slow and steady gets you a tight, air-free seal that works nearly as well as a vacuum sealer.
Shake the bag before cutting it open. The butter sauce settles during cooking. A quick shake right before you open the bag redistributes it so every bean gets coated rather than just the ones sitting at the bottom.
Finish in a hot skillet if you want color. The sous vide process does not add browning or caramelization. If you want a restaurant-style finish, pour the cooked beans into a very hot, dry skillet for 60–90 seconds after they come out of the bag.
They are already perfectly cooked, so all you are adding is visual appeal and a slight char note.

Add a finishing pinch of flaky salt right before serving. The salt in the bag seasons the beans through, but a small amount of flaky sea salt like Maldon scattered on top at the last second adds a bright, clean hit that elevates the whole dish noticeably.
Easy Variations to Customize Your Sous Vide Green Beans
The sealed cooking environment makes this recipe a perfect base for flavor experiments – because everything you add to the bag infuses directly into the beans over the full hour of cooking.
Garlic Butter Green Beans: Add 1–2 thinly sliced garlic cloves to the bag. They soften completely and melt into the butter sauce, giving you a garlicky, savory result without any rawness.
Lemon Herb Green Beans: Add a strip of fresh lemon zest and a few sprigs of thyme or tarragon to the bag. Finish with a squeeze of fresh lemon juice when you plate them.
Spicy Sous Vide Green Beans: Add a pinch of red pepper flakes or one thin slice of fresh chili. The heat infuses gently and builds through every bite.
Brown Butter Finish: After removing the beans, pour the bag’s butter sauce into a small pan and cook on medium-high heat until it turns golden and nutty. Drizzle it back over the beans for a noticeably richer result.
Parmesan and Black Pepper: Serve the finished beans topped with a generous grating of Parmigiano-Reggiano and freshly cracked black pepper for a simple Italian-inspired variation.
Best Ways to Serve Sous Vide Green Beans in Your Meals
These beans are one of the most versatile sides you can keep in your regular rotation, and they transition easily across different meal styles and occasions.
Alongside a Classic Protein The rich, buttery flavor and firm-yet-tender texture of sous vide green beans make them a natural partner for a well-seared steak, roasted chicken thighs, or pan-seared salmon. The simplicity of the dish keeps the focus on the main protein while the beans provide freshness and balance on the plate.
As Part of a Holiday Vegetable Spread The consistent color, texture, and glossy finish of sous vide green beans make them one of the most visually appealing vegetables on any holiday table. Serve them alongside roasted carrots, sous vide asparagus, and mashed potatoes for a spread where everything looks intentional.
In a Warm Grain Bowl Slice the cooked beans into thirds and toss into a warm bowl with farro, quinoa, or brown rice, a soft-boiled egg, and a drizzle of tahini or lemon vinaigrette. The butter from the bag acts as a built-in dressing that ties the bowl together.
As a French-Style Salad Cool the beans slightly and toss with a Dijon mustard vinaigrette, slivered toasted almonds, and thinly sliced shallots. This haricots verts-style preparation works equally well as a side dish or a light lunch on its own.
As the Base of a Better Green Bean Casserole Use these sous vide green beans instead of canned or boiled beans in a classic casserole. Their superior texture holds up through the baking process with cream sauce and crispy onions far better than softened canned beans ever could.
In Weekly Meal Prep Containers Cook a larger batch and divide across meal prep containers alongside a protein and a grain. The beans keep beautifully for three days and are one of those sides that actually makes you look forward to lunch.
How to Store Sous Vide Green Beans and Keep Them Fresh
Refrigerator: Let the beans cool to room temperature, then store in an airtight container with the butter sauce. They keep well for up to 3 days in the fridge.
Freezer: Cooked sous vide green beans can be frozen for up to 2 months, though the texture softens slightly upon reheating. Store flat in a sealed bag for easy thawing.
Reheating: The best method is a quick 30–60 second toss in a hot skillet with a small knob of butter. This revives the sauce and warms the beans without making them soggy. Avoid the microwave if possible – it heats unevenly and softens the texture in an unpleasant way.
Nutrition Facts and Dietary Notes
Approximate values per serving (half the recipe as written):
| Nutrient | Amount |
|---|---|
| Calories | ~75 kcal |
| Total Fat | 6g |
| Carbohydrates | 5g |
| Dietary Fiber | 2g |
| Protein | 1.5g |
| Sodium | ~90mg |
Dietary Adaptations:
- Gluten-Free: Naturally gluten-free as written – no modifications needed.
- Vegetarian: Yes, as written.
- Vegan: Substitute butter with extra virgin olive oil or a quality vegan butter.
- Keto / Low-Carb: An excellent fit – low in net carbs (approximately 3g) and rich in healthy fat from butter.
- Nut-Free: Yes.
Green beans are also a natural source of Vitamin C, Vitamin K, and folate, making this one of those rare side dishes that is both genuinely delicious and quietly nutritious.
Frequently Asked Questions About Sous Vide Green Beans
If you have questions about this recipe, you’ll find the answers to the most frequently asked ones below.
Can I cook sous vide green beans at a lower temperature if I want them crunchier?
Yes. Cook at 180°F (82°C) for 60 minutes for firmer, crunchier green beans. For tender beans with a slight bite, 185°F (85°C) is the best temperature.
Why does my bag keep floating, and does it affect the result?
Green beans trap small air pockets, so floating is normal. Keep the bag fully submerged with a spoon, plate, or sous vide weight to ensure even cooking.
Do I need a vacuum sealer, or can I use a regular Ziploc bag?
No. A 1-gallon freezer Ziploc bag works well. Use the water displacement method to remove the air before sealing.
Can I use frozen green beans if that is all I have?
You can, but fresh green beans give the best results. Since frozen beans are already blanched, they tend to become softer after sous vide cooking.
What else can I add to the bag to build more flavor?
It’s easy to customize them. Try adding garlic, lemon zest, fresh herbs, red pepper flakes, soy sauce, or a little miso to the bag with the butter and salt. The flavors infuse beautifully while the beans cook.
Sous Vide Green Beans Recipe
Ingredients
Method
- Preheat your sous vide water bath to 185°F (85°C).
- Add the green beans, butter, and salt to a sous vide bag or freezer-safe zip-top bag. Remove the air and seal.
- Place the bag in the water bath, weighing it down if needed, and cook for 1 hour.
- Remove the bag from the water and gently shake it to coat the beans in the butter sauce.
- Open the bag, transfer the green beans to a serving dish, and serve immediately.
Video
Notes
Some of the best cooking discoveries are also the simplest ones. Three ingredients. Five minutes of prep. One hour of doing nothing. That is all it takes to make green beans that are genuinely worth eating – bright, buttery, tender in exactly the right way, and consistently good every single time you make them.
This sous vide green beans recipe has become a permanent fixture in my side dish rotation, and I have a strong feeling it will become one in yours too.
We’d love to hear what you think of this recipe! Give it a try and let us know how it turned out by leaving a comment below. Don’t forget to follow us on Pinterest, Facebook and YouTube for more delicious recipes, cooking inspiration, and kitchen tips. Your feedback and support help us continue creating content you’ll love!
I got a circulator a couple of weeks ago and made green beans today. I added butter, salt, and pepper. 183 for around 45 minutes or so. Came out nice.