
There’s something almost magical about opening your fridge on a Tuesday morning and knowing warm, homemade muffins are just 20 minutes away – no measuring, no mess. That’s exactly what the Six Week Muffin Recipe delivers.
I first discovered this old-fashioned gem tucked inside a handwritten church cookbook at my mother-in-law’s house. The pages were soft with flour dust and splattered with vanilla.
One read-through and I was completely hooked: mix one giant batch of batter, refrigerate it, and scoop fresh muffins whenever the craving strikes – for up to four to six weeks.
These muffins are warmly earthy from the bran, naturally sweet with plump raisins and dates, and satisfyingly tender in every bite. They’re hearty without being heavy, and comforting without being fussy. If you’ve never kept muffin batter in the fridge before, prepare to have your weekday mornings completely transformed.
Note: Modern food safety guidelines (USDA / Health Canada) recommend using raw egg batter within 4 weeks of refrigeration. I personally use mine within that window – but either way, having ready-to-bake batter on hand is a total game-changer.
What Are Six Week Muffins and Why Do Home Bakers Love Them?
A six week muffin – also called a refrigerator bran muffin or big-batch bran muffin – is exactly what the name suggests: a large-yield batter you prepare once and store in the refrigerator, scooping and baking small fresh batches over several weeks.
Unlike standard muffin recipes that require you to bake everything at once (and then race to eat them before they go stale), this method gives you bakery-fresh bran muffins on demand.
The flavor is rich, wheaty, and wonderfully old-fashioned – like a classic bran muffin elevated by slow cold fermentation. As the days pass, the dried fruit plumps up even further, the bran fully hydrates, and every batch you bake turns out remarkably moist and tender.
Home bakers adore this recipe because it solves a very real, everyday problem: wanting a wholesome homemade breakfast without the daily effort of baking from scratch.
Think of it as meal prep for breakfast baking. You do the work once – on a Sunday afternoon, say – and enjoy the rewards every single morning for weeks. Once you experience it, mixing a single batch of 12 muffins will feel almost quaint.
The Nostalgic History Behind the Six Week Muffin Recipe
The six week muffin is a distinctly North American kitchen tradition, most beloved during the 1970s and 1980s when big-batch cooking and pantry-stretching were everyday values in the home kitchen.
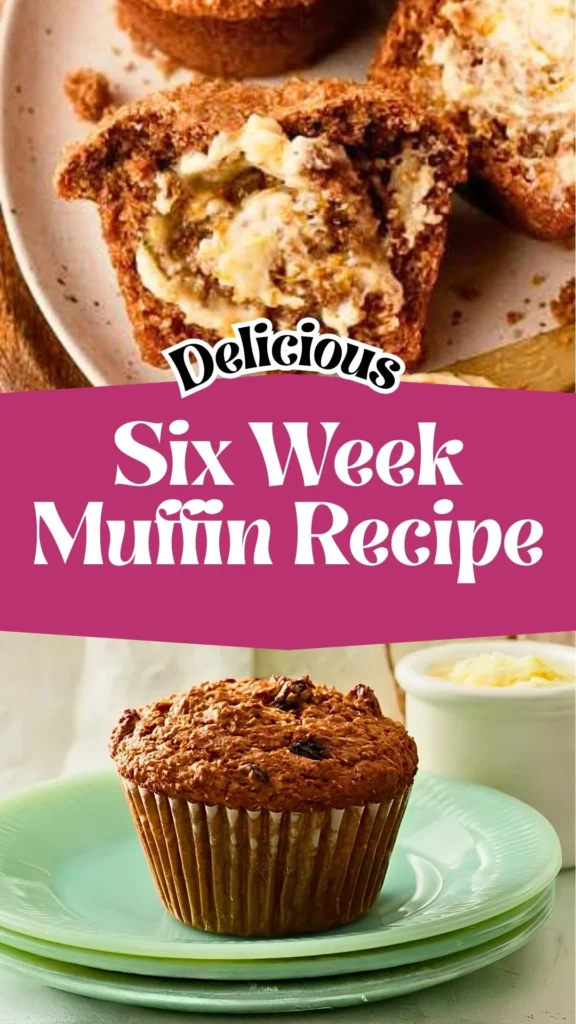
The recipe circulated widely through community cookbooks, church fundraiser pamphlets, and handwritten neighborhood recipe cards – passed along with just a simple, enthusiastic note: “You have to try this.”
What made the batter hold up so remarkably well comes down to smart food chemistry working in concert:
- High sugar content binds water and acts as a natural preservative
- Buttermilk acidity inhibits bacterial growth
- Cold storage slows microbial activity significantly
- Slow bran hydration actually improves texture over time rather than degrading
It’s worth distinguishing this classic from modern “overnight muffin batter” recipes, which rest for just 8 to 24 hours. The six week version is a true long-rest tradition – engineered for weeks in the fridge, not hours. That said, contemporary food safety guidelines from the USDA and Health Canada now recommend a maximum of four weeks for raw egg batter, which is the standard I follow and recommend.
Key Ingredients That Give Six Week Bran Muffins Their Signature Flavor
Every component in this recipe has a job. Understanding why each ingredient is here makes you a better baker and helps you make smarter substitutions.
Wheat Bran (6 cups total) The star of the show. Wheat bran provides the deep, earthy, nutty backbone of these muffins along with substantial dietary fiber. Using it in two stages – some soaked in boiling water first, the rest folded in dry – creates beautifully layered texture and prevents a uniform, gummy crumb.
Buttermilk (1 litre) The recipe’s secret preservative. Natural acidity in buttermilk inhibits bacterial growth – helping the batter keep for weeks – while also reacting with baking soda to create gentle lift and a wonderfully tender, moist crumb.
Butter (1¼ cups, softened) Full-fat butter creates richness and a satisfying, slightly dense texture that holds up beautifully across multiple bake sessions over the weeks. Don’t sub in oil here if you can avoid it – the flavor difference is real.
Sugar (3 cups) Beyond sweetness, the high sugar content is a primary reason this batter stores so well. Sugar binds water molecules and resists microbial activity – it’s preservation science disguised as dessert.
Raisins and Dates The dried fruit combination is what makes this recipe truly memorable. Raisins bring classic, jammy brightness; dates add deep caramel sweetness and extra moisture. Together they create complex, layered flavor neither fruit achieves alone.
Eggs (4 large) Provide structure and bind the enormous volume of batter together across what amounts to nearly 60 potential muffins.
Vanilla Extract (3 tsp) More important than it may seem. Vanilla rounds out the earthiness of the bran and brightens the overall flavor profile. Don’t skip it.
Baking Soda (5 tsp) The sole leavener in the classic recipe. It reacts with buttermilk’s acidity to provide rise – and notably produces the characteristic flat tops that are a hallmark of the original six week muffin.
Six Week Muffin Recipe: Full Ingredient List
Fruit Soak
| Ingredient | Amount | Notes |
|---|---|---|
| Wheat bran | 2 cups | For the boiling water soak |
| Raisins | 2 cups | Or substitute / combine with dates |
| Chopped dates | 1½ cups | Optional; a mix gives best flavor |
| Boiling water | 2 cups | Poured directly over bran + fruit |
| Pure vanilla extract | 3 tsp | Stir in with the soak |
Creamed Base
| Ingredient | Amount | Notes |
|---|---|---|
| Butter, softened | 1¼ cups | Sub: vegan butter or coconut oil |
| Granulated sugar | 3 cups | Sub: coconut sugar 1:1 |
| Large eggs | 4 | Sub: 4 flax eggs for vegan version |
| Buttermilk | 1 litre (4¼ cups) | Sub: plant milk + 1 Tbsp vinegar per cup |
Dry Ingredients
| Ingredient | Amount | Notes |
|---|---|---|
| All-purpose flour | 5 cups | Sub: GF 1:1 blend, or ¾ amount whole wheat |
| Baking soda | 5 tsp | Use 4 tsp soda + 1–2 tsp baking powder for domed tops |
| Salt | 1 Tbsp | |
| Wheat bran | 4 cups | Added dry – not soaked |
Quick Substitution Guide:
- Dried fruit: Swap for dried cranberries, cherries, or chopped prunes
- Butter → coconut oil: Works well; muffins will be slightly less rich
- Flour → whole wheat: Use ¾ the amount; denser but more nutritious
- Sugar → coconut sugar: 1:1 ratio; adds a subtle caramel undertone
Tools You Need to Make This Six Week Muffin Batter at Home
- Large mixing bowls (at least 2 – one must be very large for the full batch)
- Stand mixer or hand mixer
- Whisk
- Rubber spatula or wooden spoon (for the all-important gentle folding step)
- Standard 12-cup muffin tin(s)
- Muffin/cupcake liners or non-stick spray
- Large airtight containers or lidded pitchers (for fridge storage of the batter)
- Measuring cups and spoons
- Ice cream scoop or large spoon (for clean, even portioning)
Time at a Glance
| Prep Time | 30 minutes (including 10-min soak) |
| Cook Time | 18–20 minutes per batch |
| First Bake Total | ~50 minutes |
| Subsequent Batches | ~20 minutes (batter already done!) |
| Batter Yield | ~4 quarts / approx. 48–60 standard muffins |
| Fridge Storage | Up to 4 weeks |
Step-by-Step Instructions for Six Week Bran Muffins
Step 1 – Make the bran soak.
In a large heatproof bowl, combine 2 cups of wheat bran with the raisins, dates, or your preferred dried fruit. Pour 2 cups of boiling water over the mixture, stir in the vanilla extract, and let it sit for 10 minutes until the bran absorbs the liquid and the fruit softens and plumps.
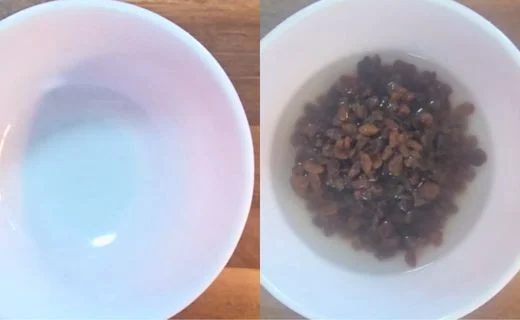
Step 2 – Pre-soak the raisins (optional but recommended).
For even plumper raisins, soak them separately in hot water for 5 minutes before adding them to the bran mixture. Drain well before using. This simple step gives the muffins a softer, juicier texture.
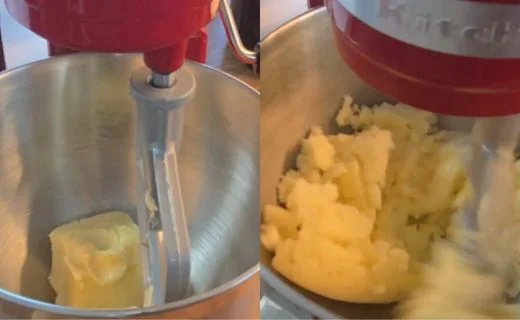
Step 3 – Cream the butter and sugar.
In a large mixing bowl, beat the softened butter and sugar with a hand or stand mixer on medium-high speed for 3 to 4 minutes, or until light and fluffy. Taking the time to cream them well helps create tender muffins.
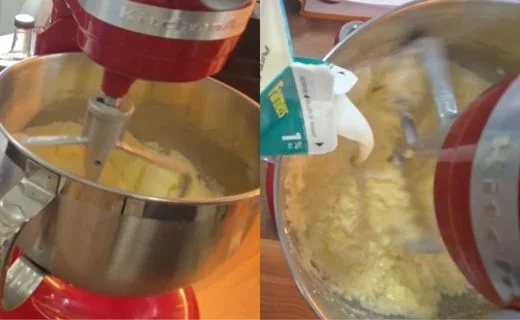
Step 4 – Add the eggs.
Beat in the eggs one at a time, mixing well after each addition. Scrape down the sides of the bowl as needed until the mixture is smooth and fully combined.
Step 5 – Add the wet ingredients.
Stir the buttermilk and the bran mixture into the butter mixture until just combined. Don’t worry if the batter looks thick and textured – that’s exactly how it should look.
Step 6 – Mix the dry ingredients.
In a separate bowl, whisk together the flour, baking soda, salt, and the remaining 4 cups of wheat bran until evenly combined.
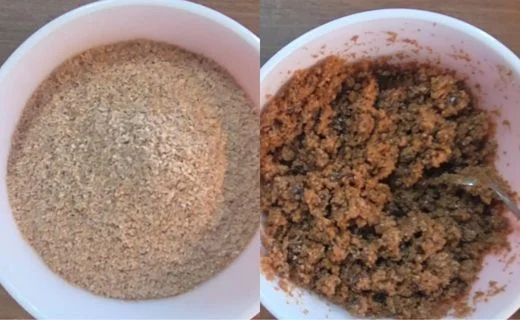
Step 7 – Combine the batter.
Add the dry ingredients to the wet ingredients in 2 or 3 additions, folding gently with a rubber spatula or wooden spoon after each addition. Mix just until no dry streaks remain. A few lumps are perfectly fine, so avoid overmixing.
Step 8 – Store the batter.
Transfer the batter to one or more large airtight containers or lidded pitchers. Label each container with the date, then refrigerate for up to 4 weeks.
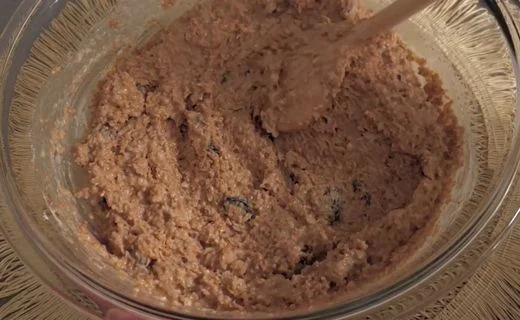
Step 9 – Bake when ready.
When you’re ready to bake, preheat the oven to 400°F (200°C) and grease or line a muffin tin. Scoop the cold batter straight from the refrigerator into the muffin cups, filling each about ¾ full. There’s no need to let the batter come to room temperature.
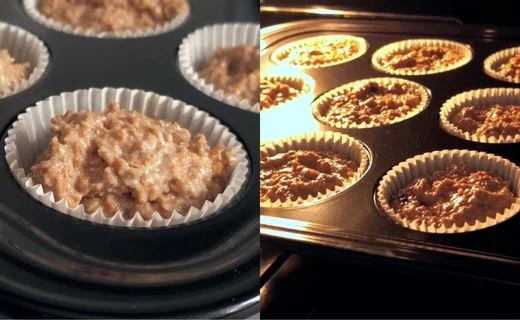
Step 10 – Bake and Serve.
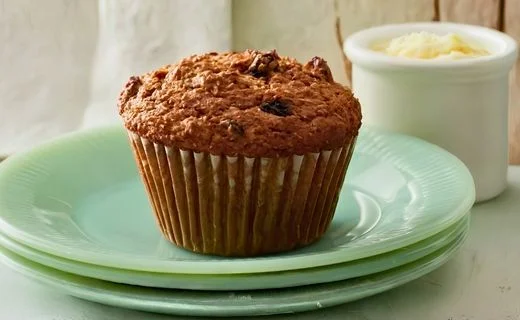
Bake for 18 to 20 minutes, or until the tops are set and a toothpick inserted into the center comes out clean. Let the muffins cool in the pan for 5 minutes, then transfer them to a wire rack to cool completely. Now serve and enjoy.
Pro Tips for Getting the Flavor Just Right
Don’t skip the bran soak.
Let the bran and fruit soak for the full 10 minutes. This softens the bran, plumps the fruit, and gives the muffins a moist, tender texture instead of a dry or gritty crumb.
Soak the raisins for extra softness.
For plumper raisins, soak them in hot water for 5 minutes before adding them to the batter. Drain well before using so they don’t add extra water.
Use both raisins and dates.
Using both gives the best flavor and texture. Raisins add a fruity sweetness, while dates make the muffins richer, softer, and more moist.
Don’t overmix the batter.
Once you add the dry ingredients, stir just until everything is combined. A few small lumps are perfectly fine. Overmixing can make the muffins tough instead of soft and tender.
Want taller muffin tops?
The classic recipe makes flatter muffins because it uses baking soda only. For taller, domed muffins, replace 1 to 2 teaspoons of baking soda with baking powder, or bake at 425°F (220°C) for the first 5 minutes before reducing the oven to 375°F (190°C).
Bake straight from the refrigerator.
There’s no need to let the batter warm up. Scoop it straight from the fridge into the muffin pan for the most consistent results.
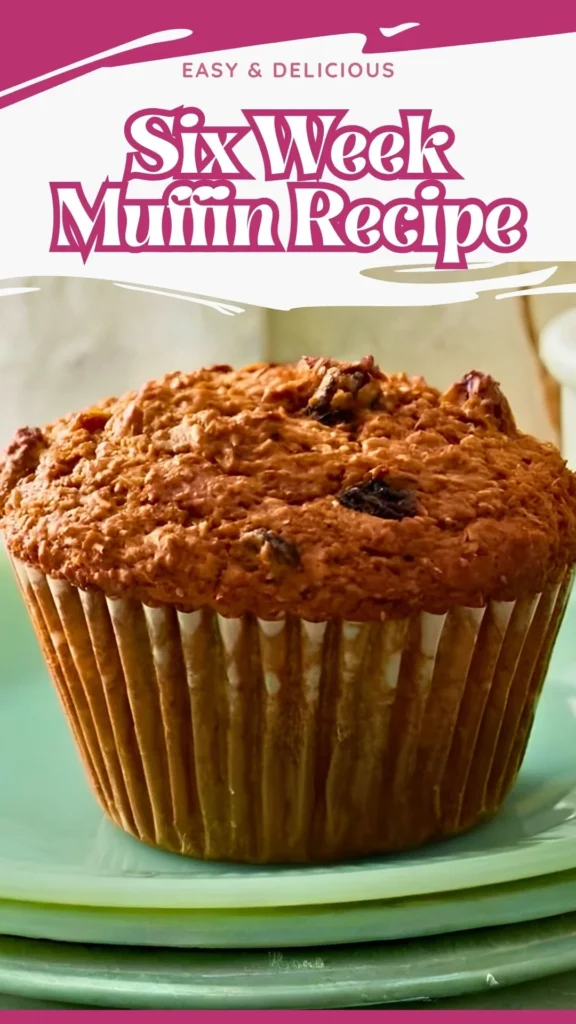
The batter gets better over time.
The muffins taste great on day one, but many bakers find the flavor improves after a week or two as the bran continues to soften and the flavors blend together.
Easy Variations to Customize Your Six Week Bran Muffins
One of the greatest things about keeping this refrigerator muffin batter on hand is how easily each small batch can go in a completely different direction.
Add nuts for crunch. Fold in ½ cup of chopped walnuts or pecans per 12 muffins just before scooping. The toasty, nutty note is a natural pairing with earthy bran.
Go tropical. Swap the dates for chopped dried mango or pineapple, and stir a little orange zest into the batter portion for a bright, summery variation.
Make it chocolatey. Stir ½ cup of dark chocolate chips into each batch before baking. The slight bitterness of dark chocolate against earthy bran is surprisingly and deeply satisfying.
Warm autumn spice version. Add 1 tsp cinnamon, ½ tsp nutmeg, and a pinch of cardamom to the dry ingredients. Top with a sprinkle of turbinado sugar before baking for a cozy fall muffin.
Lighter swap. Replace half the all-purpose flour with whole wheat flour and reduce the sugar by ½ cup – the dates naturally compensate with their own deep sweetness, and you’ll barely notice the difference.
Best Ways to Enjoy Six Week Bran Muffins in Your Meals
These bran muffins are easy to enjoy any time of the day. Here are a few simple ways to serve them.
Serve warm with butter.
Split a warm muffin in half and spread it with butter while it’s still hot. Enjoy it with Toll House Gluten Free Cookie, a cup of coffee, tea, or a glass of milk.
Pair with yogurt and fruit.
Serve a muffin with Greek yogurt and fresh berries or sliced bananas for a balanced breakfast or snack.
Make it part of brunch.
Pair the muffins with scrambled eggs, bacon, sausage, or fresh fruit for an easy weekend brunch.
Spread with your favorite topping.
Try peanut butter, almond butter, cream cheese, honey, or your favorite fruit jam for extra flavor.
Pack it for lunch or a snack.
These muffins travel well, making them perfect for lunchboxes, road trips, or an afternoon snack.
Share with family and friends.
Bake a fresh batch whenever guests visit or package a few muffins as a thoughtful homemade gift.
How to Store Six Week Muffin Batter and Keep It Fresh
Store the batter in a large airtight container or lidded pitcher in the refrigerator for up to 4 weeks. While some older recipes say it lasts 6 weeks, current USDA and Health Canada guidelines recommend using batter with raw eggs within 4 weeks.
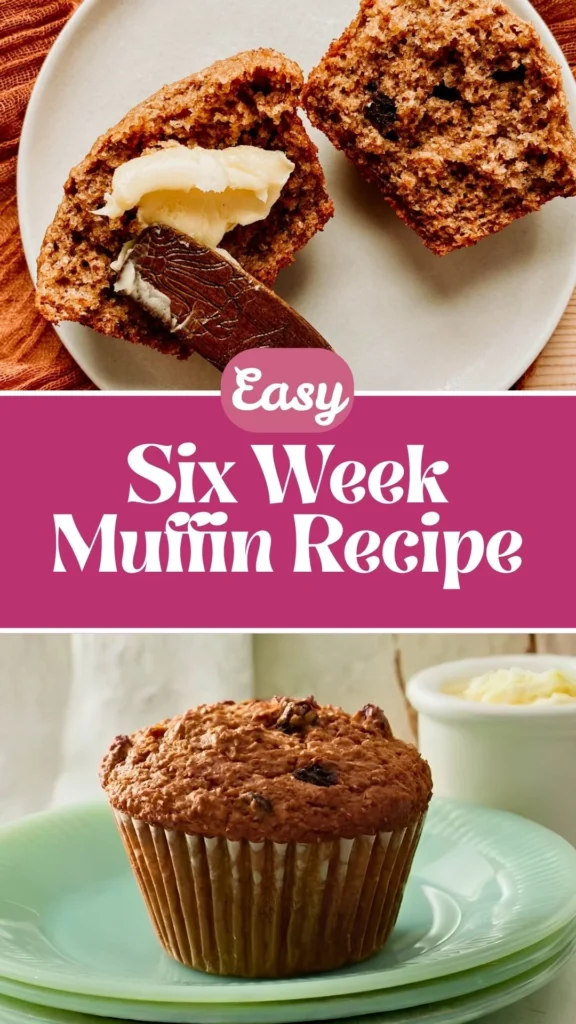
Always use a clean spoon or scoop each time you take out batter. Never put a used spoon back into the container, as it can introduce bacteria and shorten the batter’s shelf life.
Baked muffins keep at room temperature in an airtight container for 3–4 days, or refrigerated for up to 1 week.
To freeze baked muffins: Cool completely, then freeze in a sealed zip-lock bag or airtight container for up to 3 months. Reheat from frozen at 300°F (150°C) for 12–15 minutes, or microwave on medium power for 45–60 seconds.
Nutrition Facts and Dietary Notes
Approximate values per standard muffin based on a ~54-muffin yield:
| Nutrient | Per Muffin |
|---|---|
| Calories | ~195 kcal |
| Carbohydrates | ~34g |
| Total Fat | ~6g |
| Protein | ~4g |
| Dietary Fiber | ~3g |
| Sugar | ~18g |
Dietary Adaptations:
- Dairy-Free / Vegan: Use vegan butter and plant-based buttermilk (plant milk + 1 Tbsp apple cider vinegar per cup, rested 5 min). Replace eggs with flax eggs (1 Tbsp ground flax + 3 Tbsp water per egg).
- Gluten-Free: Substitute a certified 1:1 GF baking flour blend. Expect a slightly denser texture that’s still delicious.
- High-Fiber Benefit: Each muffin delivers meaningful dietary fiber from wheat bran, supporting digestive regularity, sustained energy release, and satiety – making these a genuinely nourishing choice, not just a convenient one.
Frequently Asked Questions About the Six Week Muffin Recipe
Find answers to the most common questions about this recipe right here.
1. Can I really keep muffin batter in the fridge for six weeks?
Yes, but 4 weeks is a safer choice. While this recipe was originally designed to last up to six weeks in the refrigerator, current food safety guidelines recommend using batter with raw eggs within 4 weeks. Keep it in an airtight container and always check that it still looks and smells fresh before baking.
2. Do I have to bring the batter to room temperature before baking?
No, you don’t. Scoop the batter straight from the refrigerator into your prepared muffin pan. Cold batter bakes beautifully and helps make soft, evenly baked muffins.
3. Why are my six week muffins flat on top?
Flat tops are completely normal for this recipe. The original recipe uses baking soda, which creates a lower rise. If you prefer taller muffins, replace 1 to 2 teaspoons of baking soda with baking powder and start baking at 425°F for the first 5 minutes before lowering the temperature to 375°F.
4. Can I freeze the batter instead of refrigerating it?
Yes, you can. Portion the batter into muffin cups, freeze until solid, then store the frozen portions in a freezer bag. Thaw them overnight in the refrigerator before baking. Freezing works well if you won’t use the batter within 4 weeks.
5. What’s the best container for storing the batter?
An airtight container is the best choice. A large container or a wide-mouth pitcher makes it easy to scoop out the batter whenever you’re ready to bake. Make sure the lid seals tightly to keep the batter fresh and prevent it from absorbing refrigerator odors.
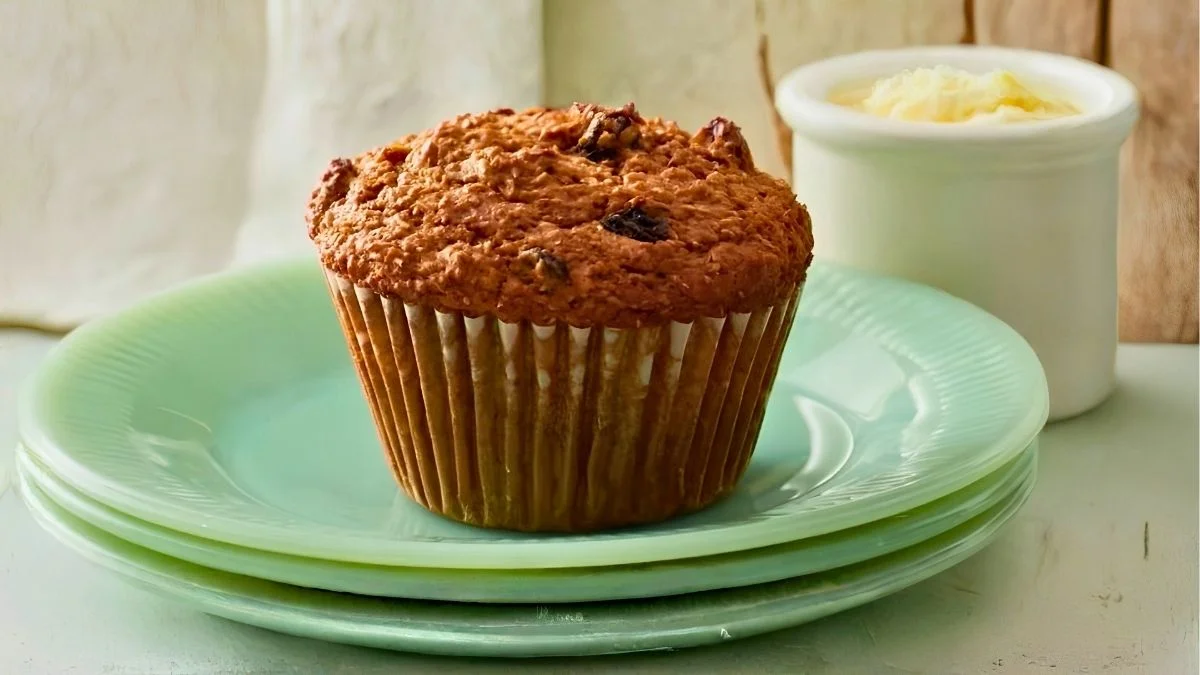
Six Week Muffin Recipe
Ingredients
Method
- Combine 2 cups wheat bran, raisins, dates, boiling water, and vanilla in a large bowl. Let stand for 10 minutes.
- (Optional) Soak the raisins separately in hot water for 5 minutes, then drain before adding.
- Beat the butter and sugar until light and fluffy, about 3–4 minutes.
- Add the eggs one at a time, mixing well after each addition.
- Stir in the buttermilk and bran mixture until just combined.
- In another bowl, whisk together the flour, baking soda, salt, and remaining 4 cups wheat bran.
- Fold the dry ingredients into the wet ingredients until no dry flour remains. Do not overmix.
- Transfer the batter to an airtight container, label with the date, and refrigerate for up to 4 weeks.
- When ready to bake, preheat the oven to 400°F (200°C). Fill muffin cups about ¾ full with cold batter.
- Bake for 18–20 minutes, or until a toothpick inserted into the center comes out clean. Cool in the pan for 5 minutes before transferring to a wire rack.
Video
Notes
Once you’ve made your first batch, you’ll always have homemade muffins just minutes away. Whether you’re baking breakfast for the family or grabbing a quick snack during the week, this Six Week Muffin Recipe makes fresh muffins easier than ever.
We’d love to hear what you think of this recipe! Give it a try and let us know how it turned out by leaving a comment below. Don’t forget to follow us on Pinterest, Facebook and YouTube for more delicious recipes, cooking inspiration, and kitchen tips. Your feedback and support help us continue creating content you’ll love!
Lovely! I love large batch recipes, I don’t like messing up the whole kitchen for a snack, Thanks